In this guide, you’ll create and deploy your first MCP (Model Context Protocol) server using Gumstack. By the end, you’ll have a working server with a custom tool that AI assistants like Claude, Cursor, and others can use, all deployed and ready in minutes.Documentation Index
Fetch the complete documentation index at: https://docs.gumstack.com/llms.txt
Use this file to discover all available pages before exploring further.
Prerequisites
Before you start building, make sure you have:- GitHub connected in Settings. Gumstack needs this to create and manage your server’s repository.
- GitHub App installed for automatic deployments on push.
- Python 3.10+ and uv (recommended) or pip installed locally.
If you haven’t connected GitHub yet, head to Settings first.
Create your server
Open the Create Server wizard
Go to Internal MCPs and click Create New Server. This opens a full-screen wizard that walks you through setup.
Enter basic info
Give your server a name and description. Select your GitHub organization and a repository name. Gumstack validates the repository name in real-time to ensure it’s available.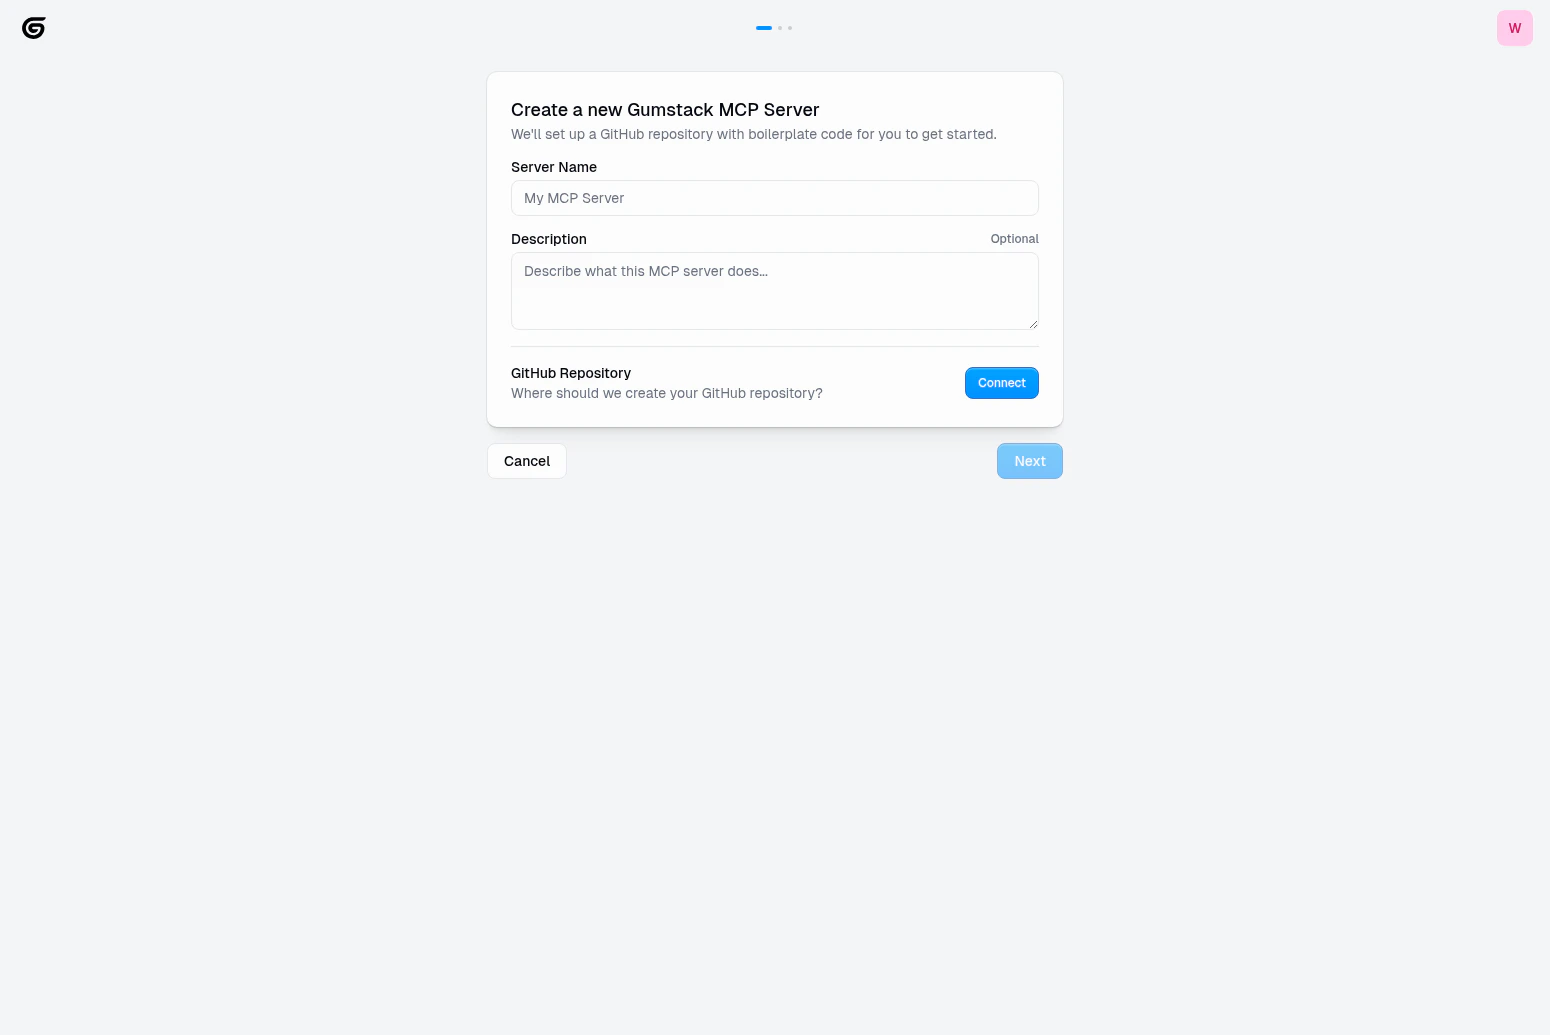
| Field | Description |
|---|---|
| Server name | Display name shown in the Gumstack dashboard |
| Description | Brief explanation of what the server does |
| GitHub Owner/Org | Which GitHub org to create the repo in |
| Repository Name | Must be unique, alphanumeric with -_. |
| Visibility | Public, private, or internal |
Configure authentication
Choose how users will authenticate with your server. This determines how your MCP server accesses external services on behalf of users.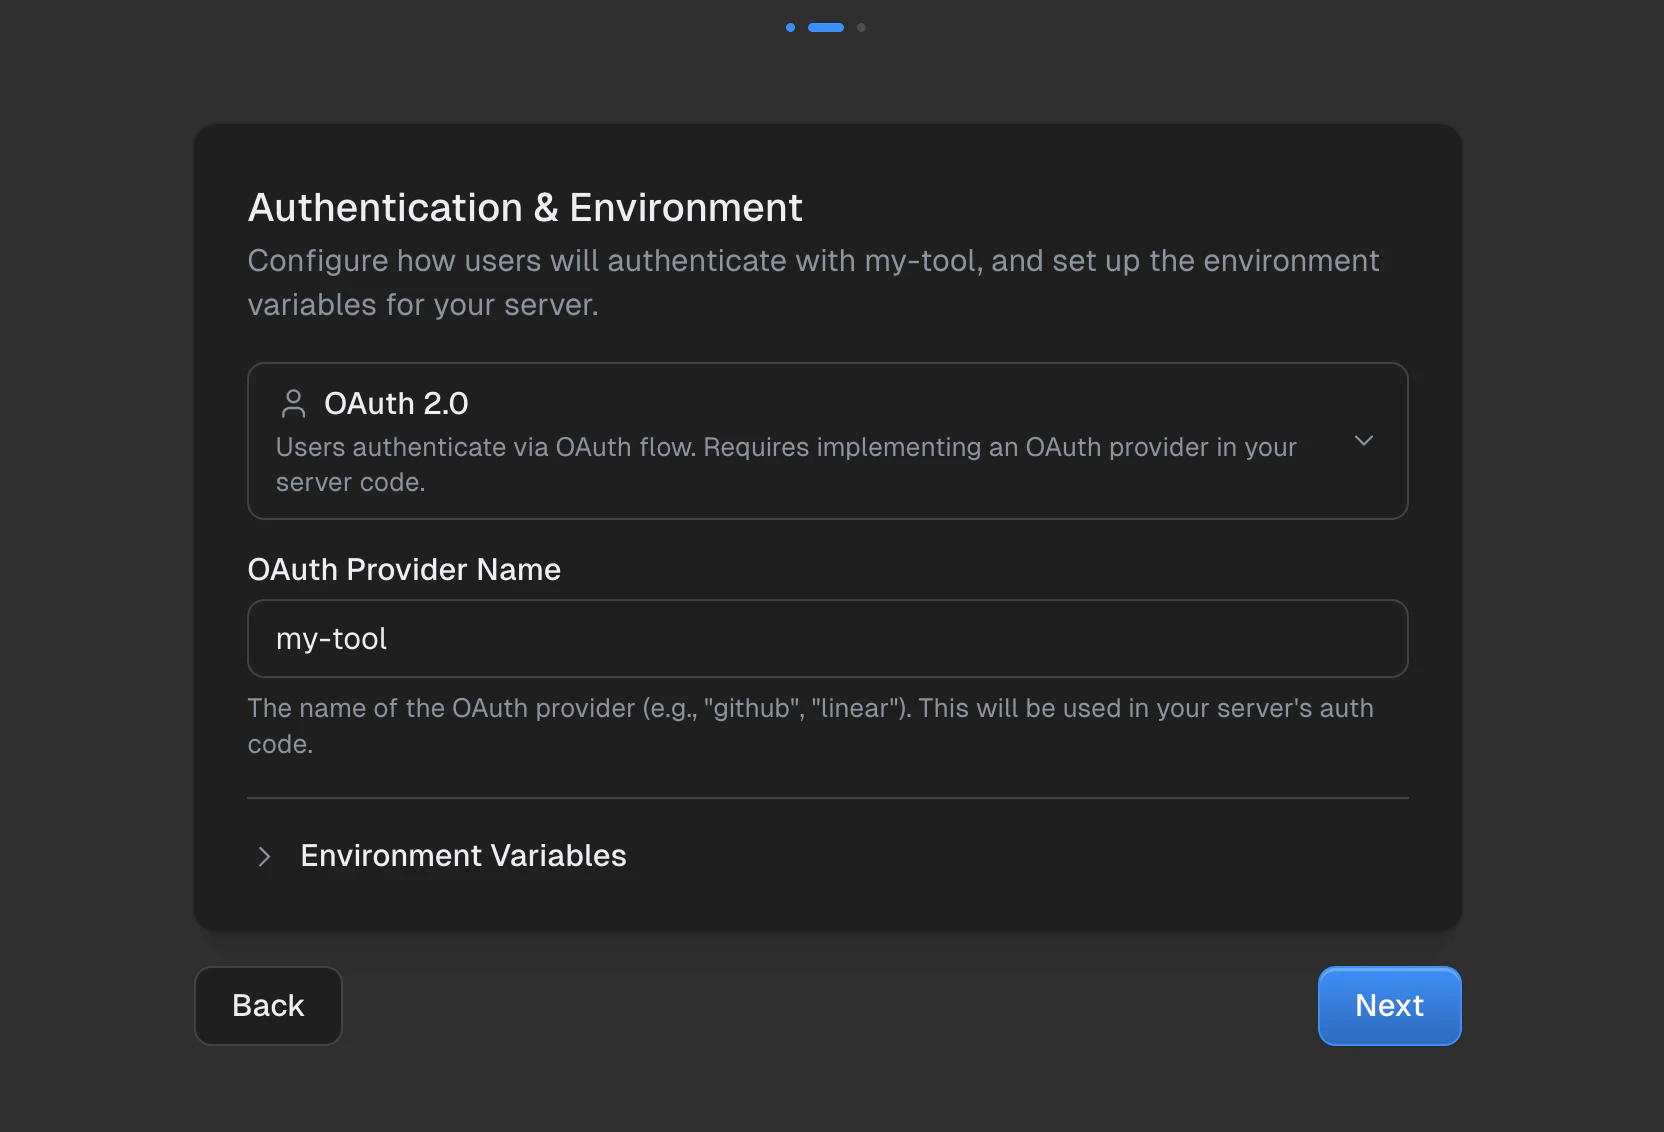
You can also add environment variables for any secrets your server needs at runtime (e.g.,
| Auth Type | Use when |
|---|---|
| OAuth 2.0 | Users authorize via OAuth flow (Linear, GitHub, Slack, etc.) |
| API Key / Credentials | Users enter their own API keys in the Gumstack UI |
| No Authentication | You provide shared keys via environment variables |
CLIENT_SECRET, API_BASE_URL).Review and create
Double-check your configuration. Each section has an Edit button to jump back and make changes. Click Create to generate everything.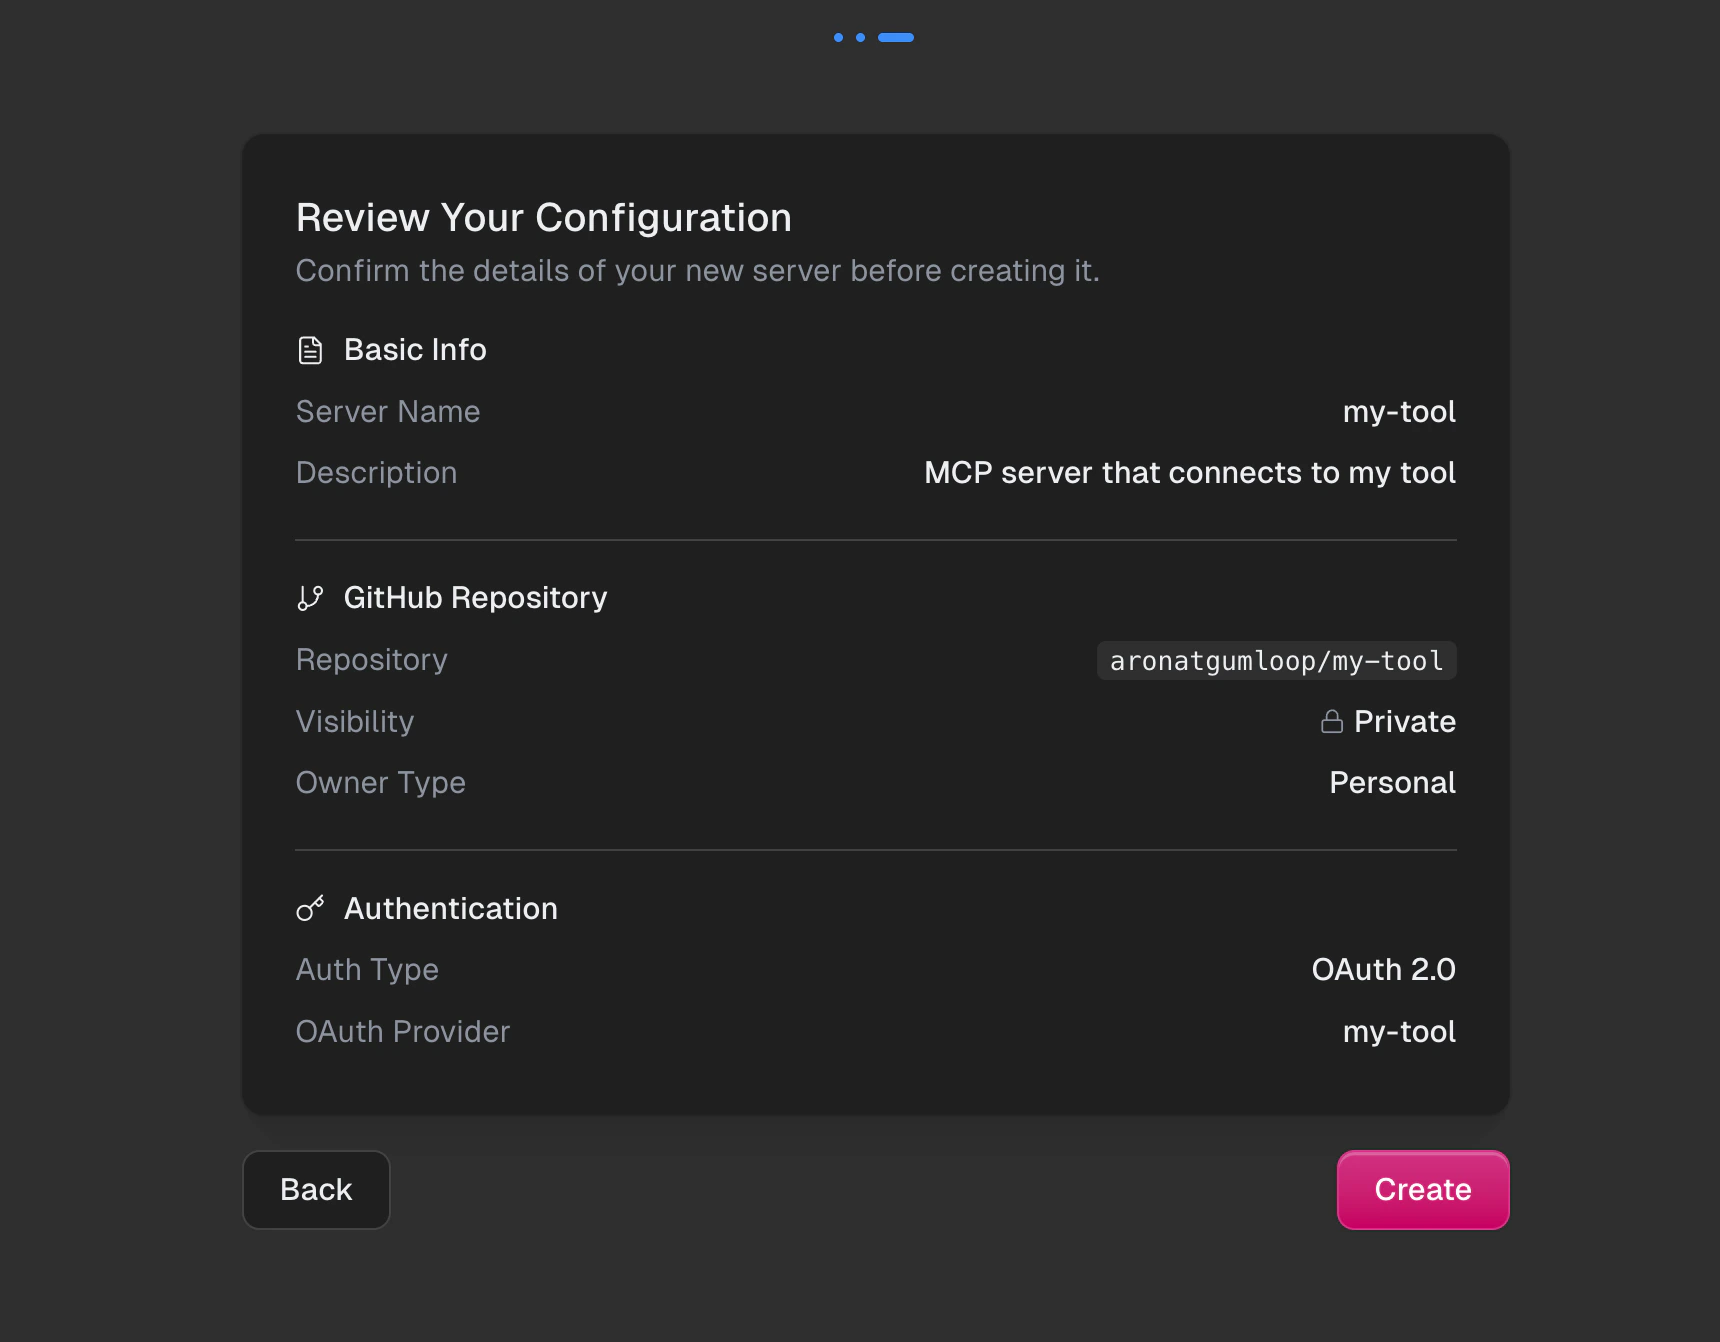
- Create a GitHub repository with the full project template
- Set up the CI/CD deployment pipeline
- Configure authentication based on your selection
Install the GitHub App (if prompted)
If the Gumloop GitHub App isn’t installed on your new repository, you’ll see a prompt to install it. This enables automatic deployments when you push code.You can skip this and set it up later in Settings, but deployments won’t be automatic until it’s installed.
Clone and install
Clone the repository Gumstack created and install dependencies.- uv (recommended)
- pip
We recommend uv for fast, reliable Python package management.
Add your first tool
Tools are the functions your MCP server exposes to AI assistants. Each tool has a name, description, and logic that the AI can invoke. Editsrc/server.py:
config.yaml so Gumstack knows to expose it:
Deploy
Push your code to trigger an automatic deployment:main. You can monitor the deployment from the Deployments tab on your server’s detail page.
Your server is live! You can find its URL on the server’s Overview tab in Internal MCPs.
What’s next?
Project Structure
Understand your server’s file layout
Tools
Learn tool best practices and patterns
Authentication
Implement OAuth, credentials, or env vars
Using in Gumloop
Connect your server to Gumloop workflows