Permission groups are how you manage access control in Gumstack. Create groups that match your teams, add users, and configure what each group can access: tools, features, scopes, and pipeline nodes.Documentation Index
Fetch the complete documentation index at: https://docs.gumstack.com/llms.txt
Use this file to discover all available pages before exploring further.
How it works
- Create groups that match your organization’s teams or roles
- Add users to the appropriate group
- Configure access per group: tool access, feature restrictions, app scopes, and node denylists
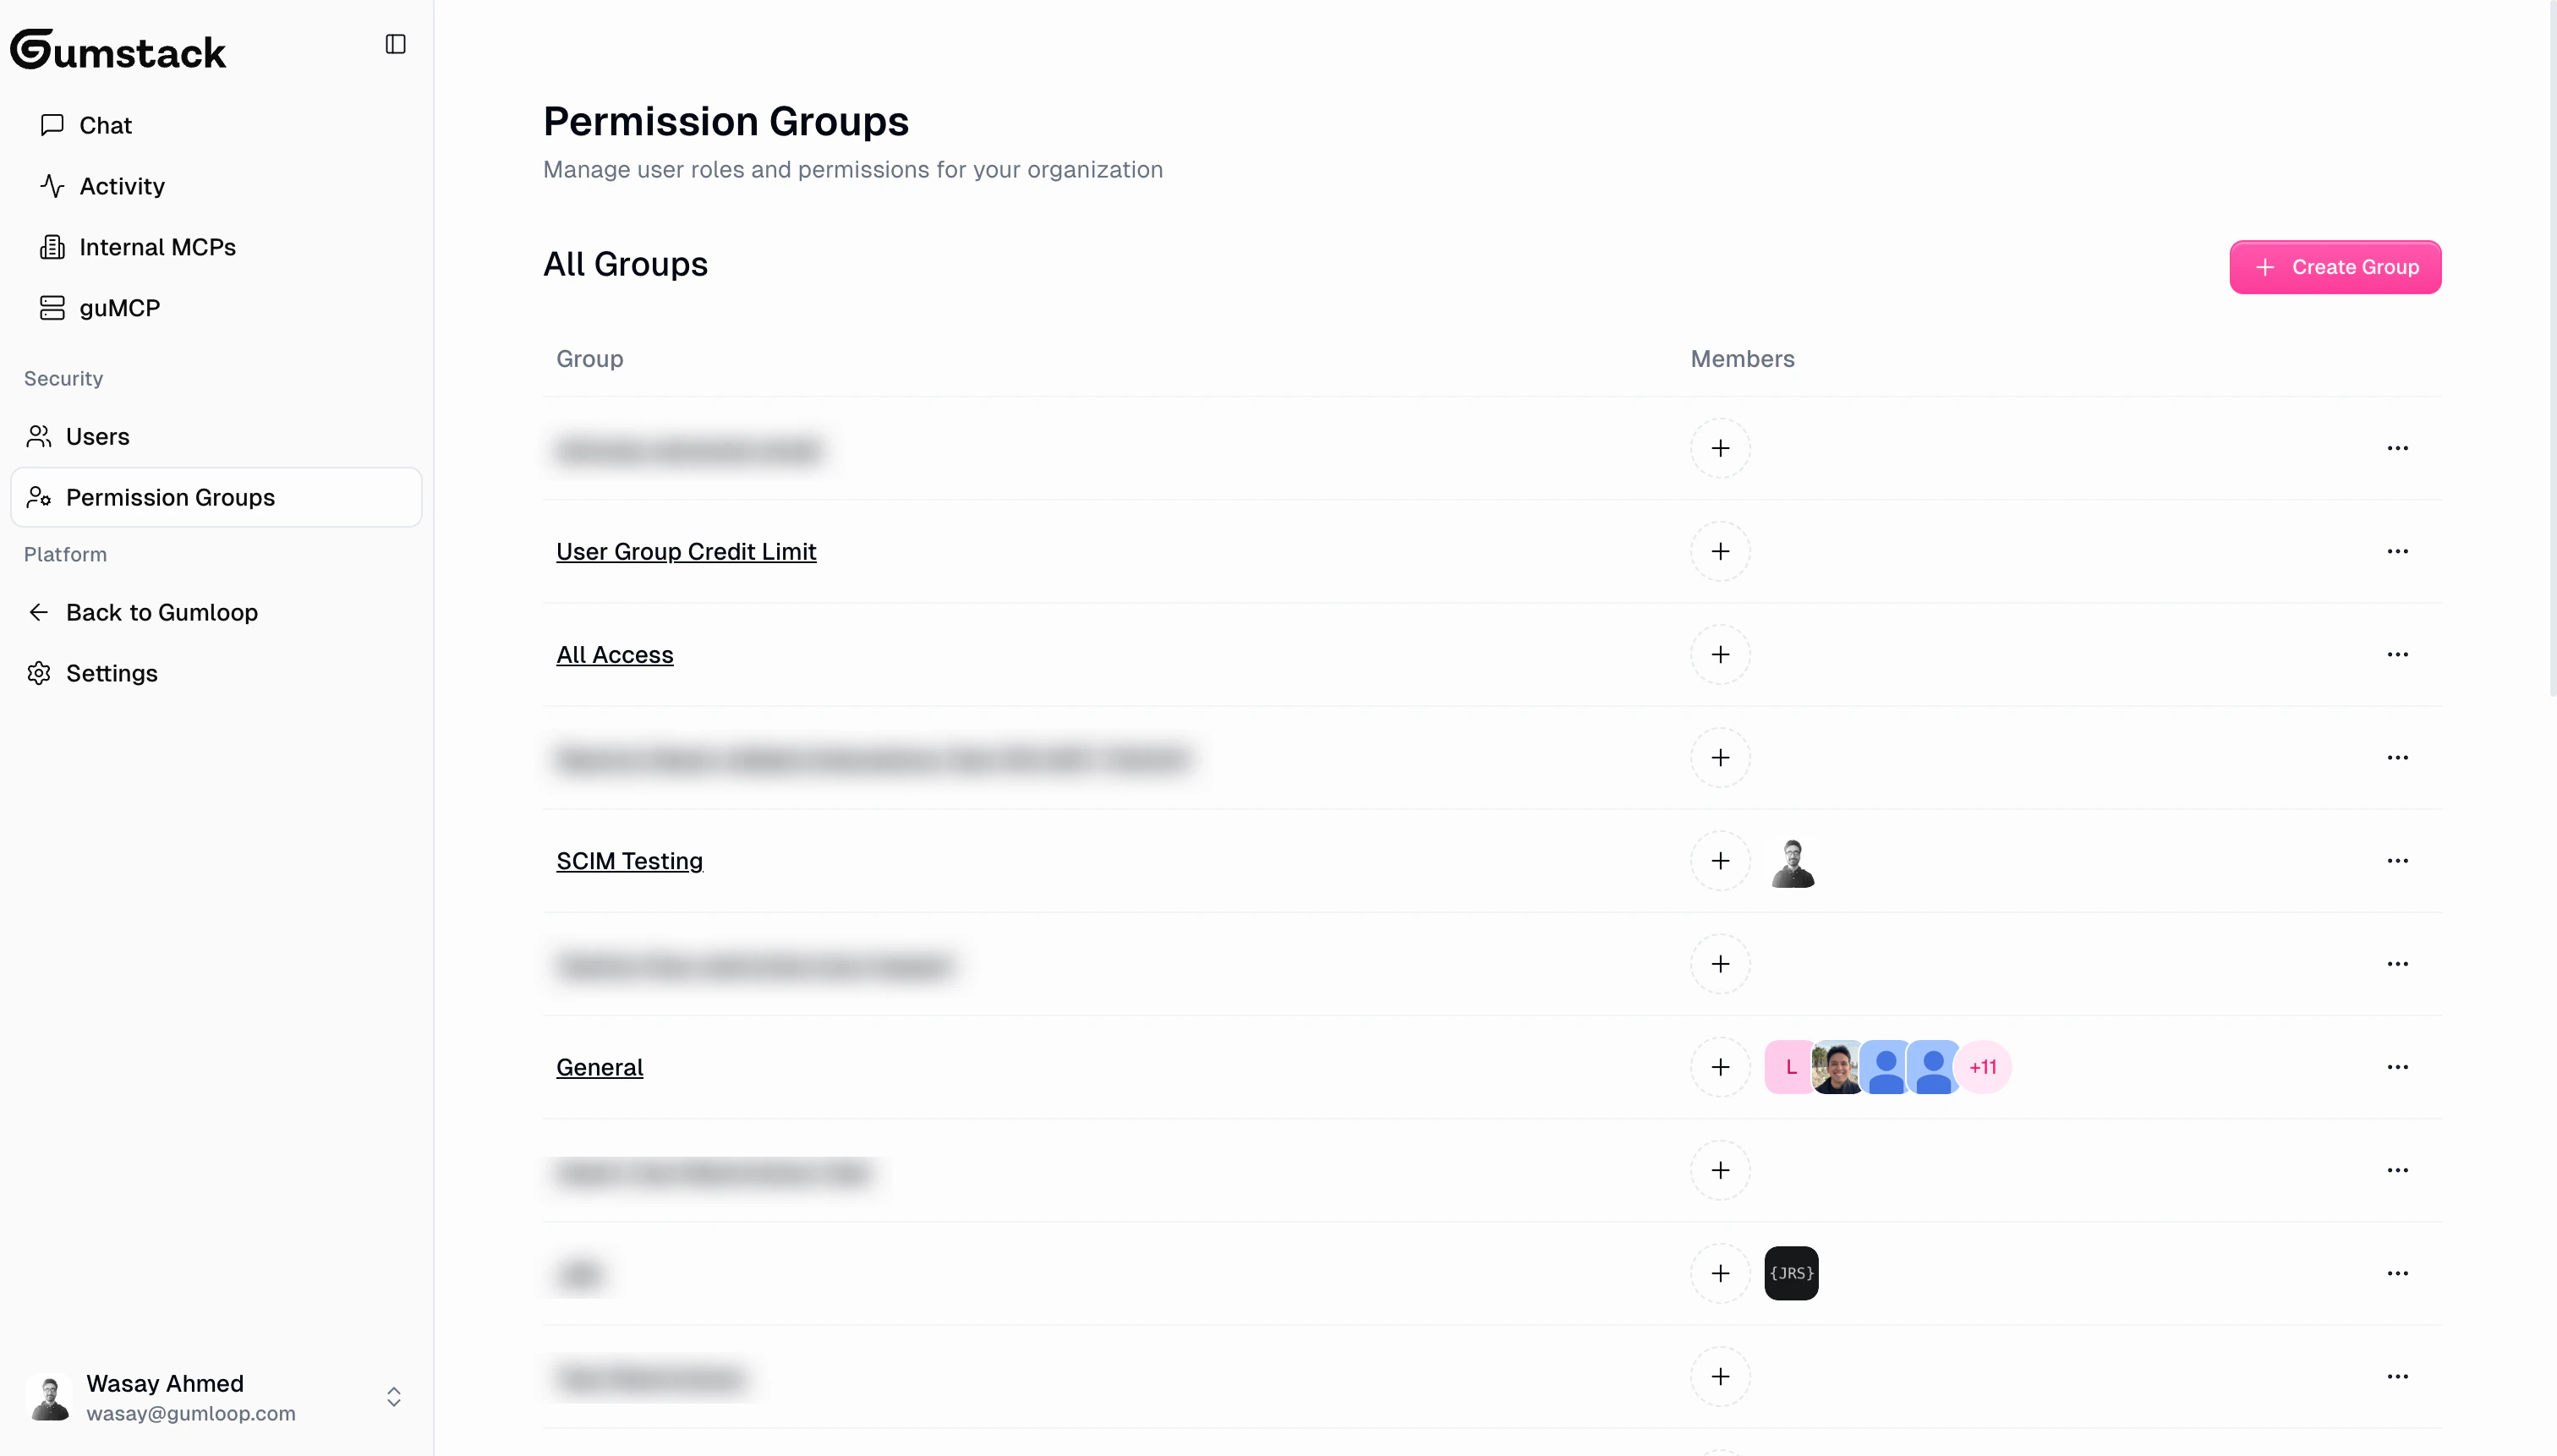
Permission groups list
The list page shows all your groups with their name, member count, and recent member avatars. The default group is marked with a “Default” badge.Creating a group
Click Create Group to open the create dialog. You only need to provide a group name. All other settings are configured after creation on the group’s detail page.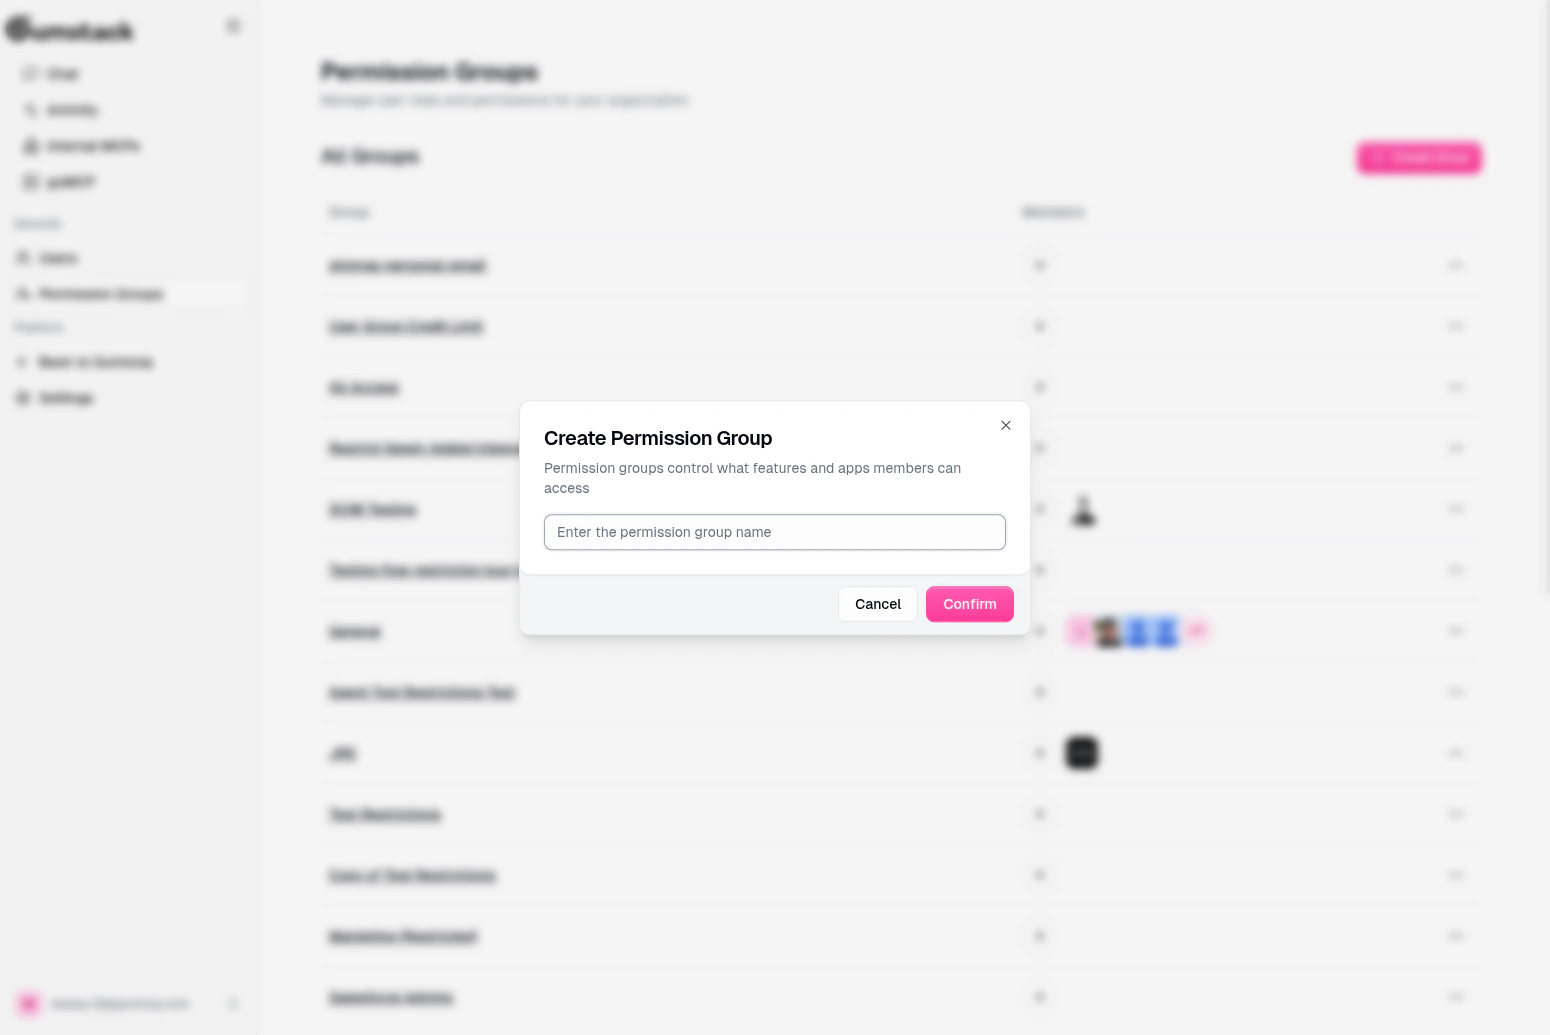
Group detail
Click any group to see its detail page with five configurable views.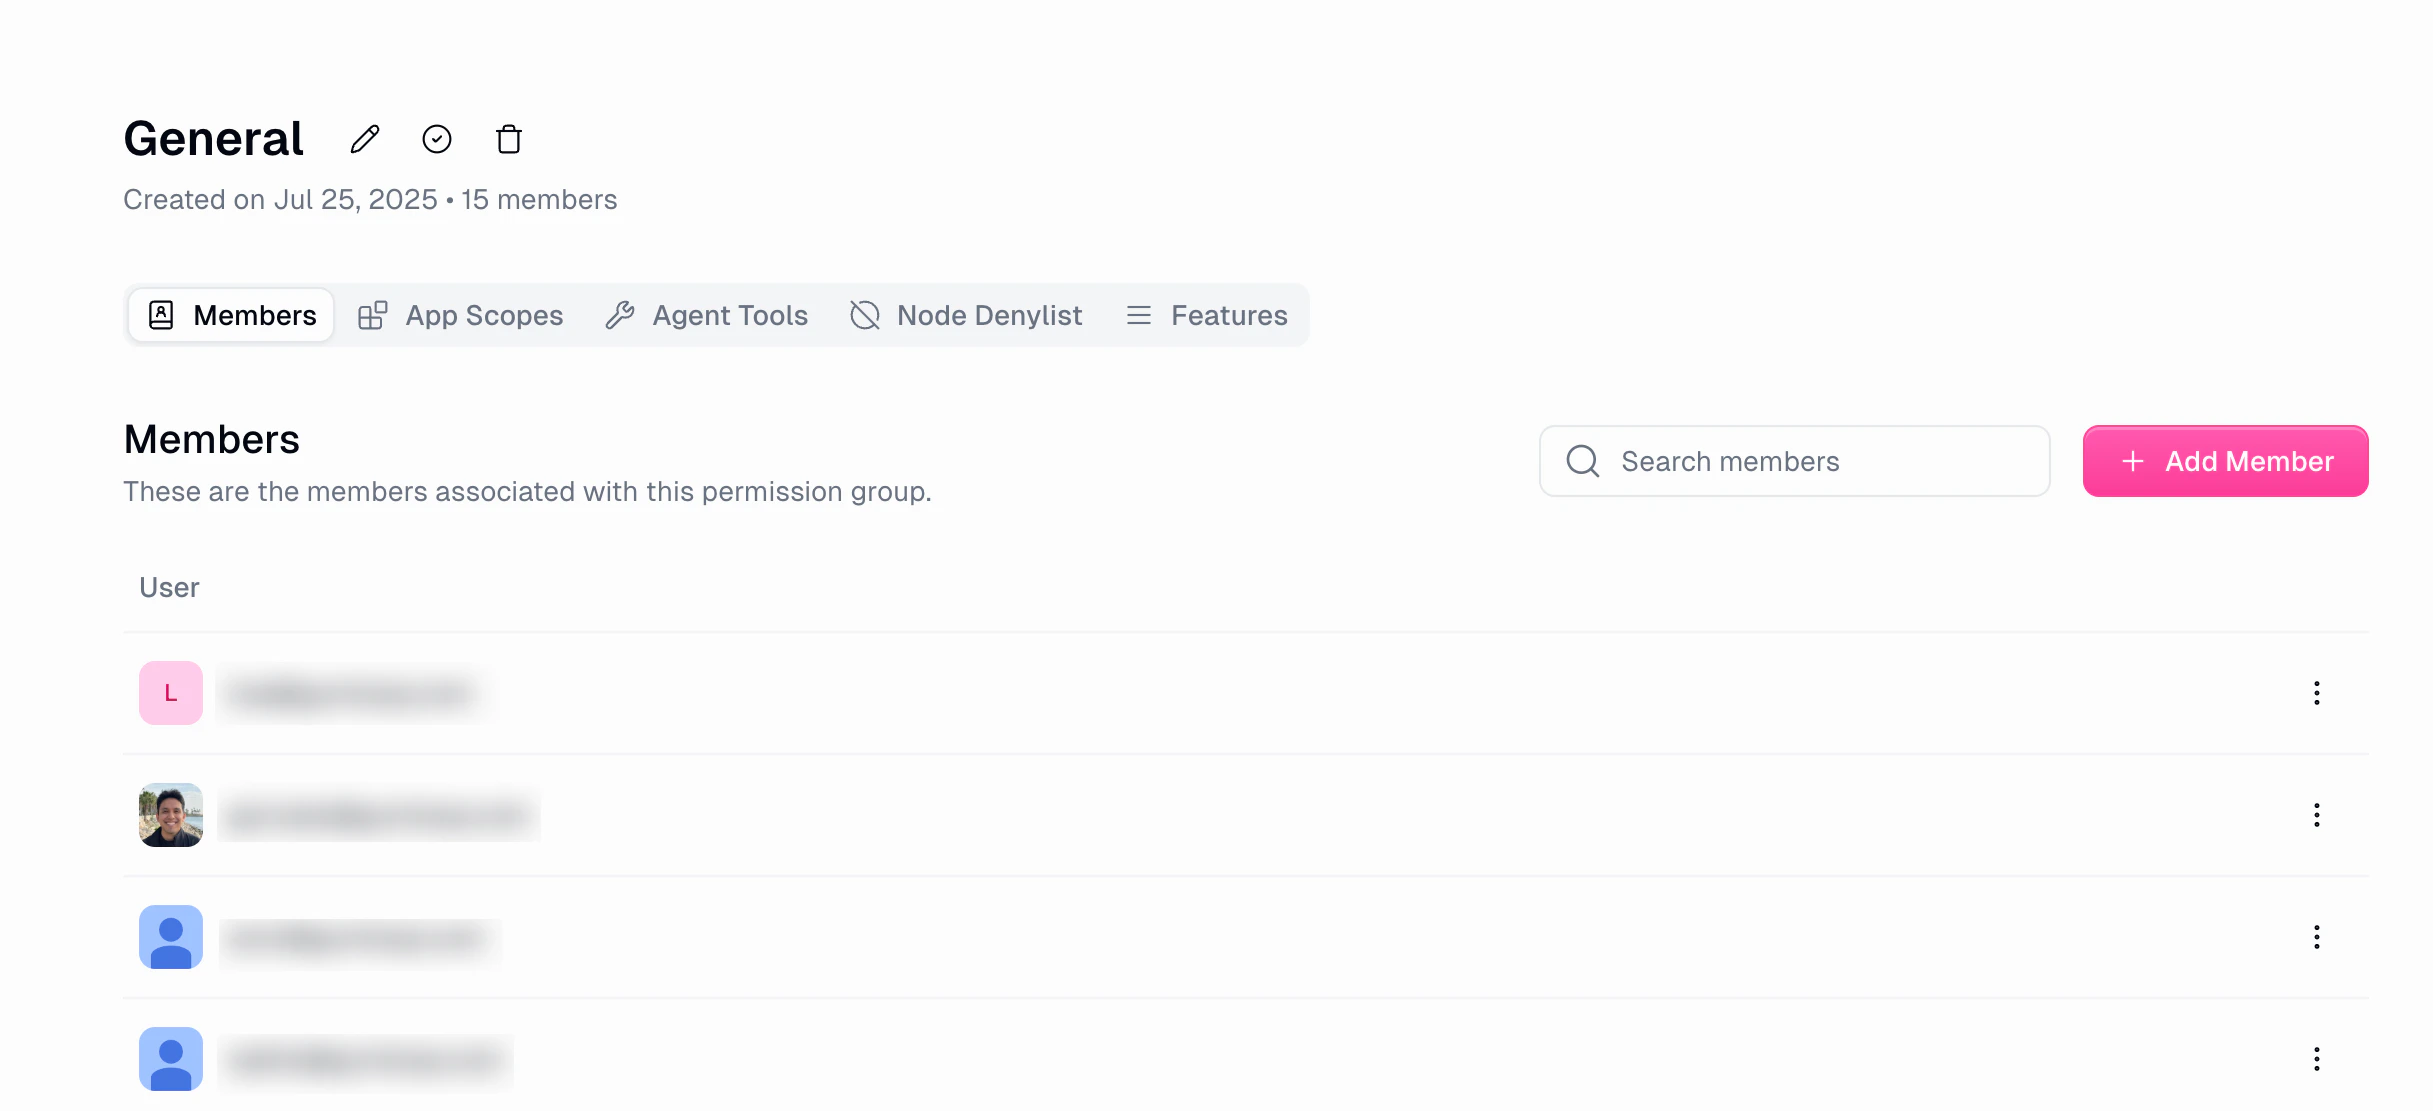
Members
Manage who belongs to this group. Use Search to filter members, click Add Member to add users from your organization, and use the dropdown on any member row to Remove them. Paginated at 15 members per page.Features
Toggle feature restrictions and set usage limits for members of this group. Restrictions (on/off toggles):| Restriction | Description |
|---|---|
| Restrict Workspace Creation | Cannot create new workspaces |
| Restrict Workspace Credential Addition | Cannot add credentials to workspaces |
| Restrict MCP Node Creation | Cannot create MCP nodes |
| Restrict Sharing Public Flows | Cannot share flows and interfaces publicly |
| Restrict Flow Modification | Cannot create, update, or delete flows and workbooks |
| Restrict Agent Modification | Cannot create, update, or delete agents |
| Limit | Description |
|---|---|
| User Concurrent Run Limit | Maximum concurrent workflow runs per user (0 to org limit) |
| User Monthly Credit Cap | Monthly credit cap per user (leave blank for org limit) |
Agent Tools
Control which MCP server tools this group’s members can access.- Click Add Tool Restrictions to select servers and configure tool-level access
- Each entry shows the server name, restricted tools, and date added
- Edit or delete existing restrictions
App Scopes
Restrict which OAuth scopes this group’s members can use for each app category.- Click Add App Scopes to configure scope restrictions
- Each entry shows the app category, configured scopes, and date added
- Edit or delete existing scope restrictions
Node Denylist
Block specific pipeline nodes for this group.- Click Add Nodes to select nodes to block
- Blocked nodes won’t appear in the Gumloop pipeline builder for members of this group
- Edit or delete existing denylists
Header actions
The group detail header includes: Rename (pencil icon), Set as Default Group (only for non-default groups), and Delete (only for non-default groups, requires confirmation).Default group
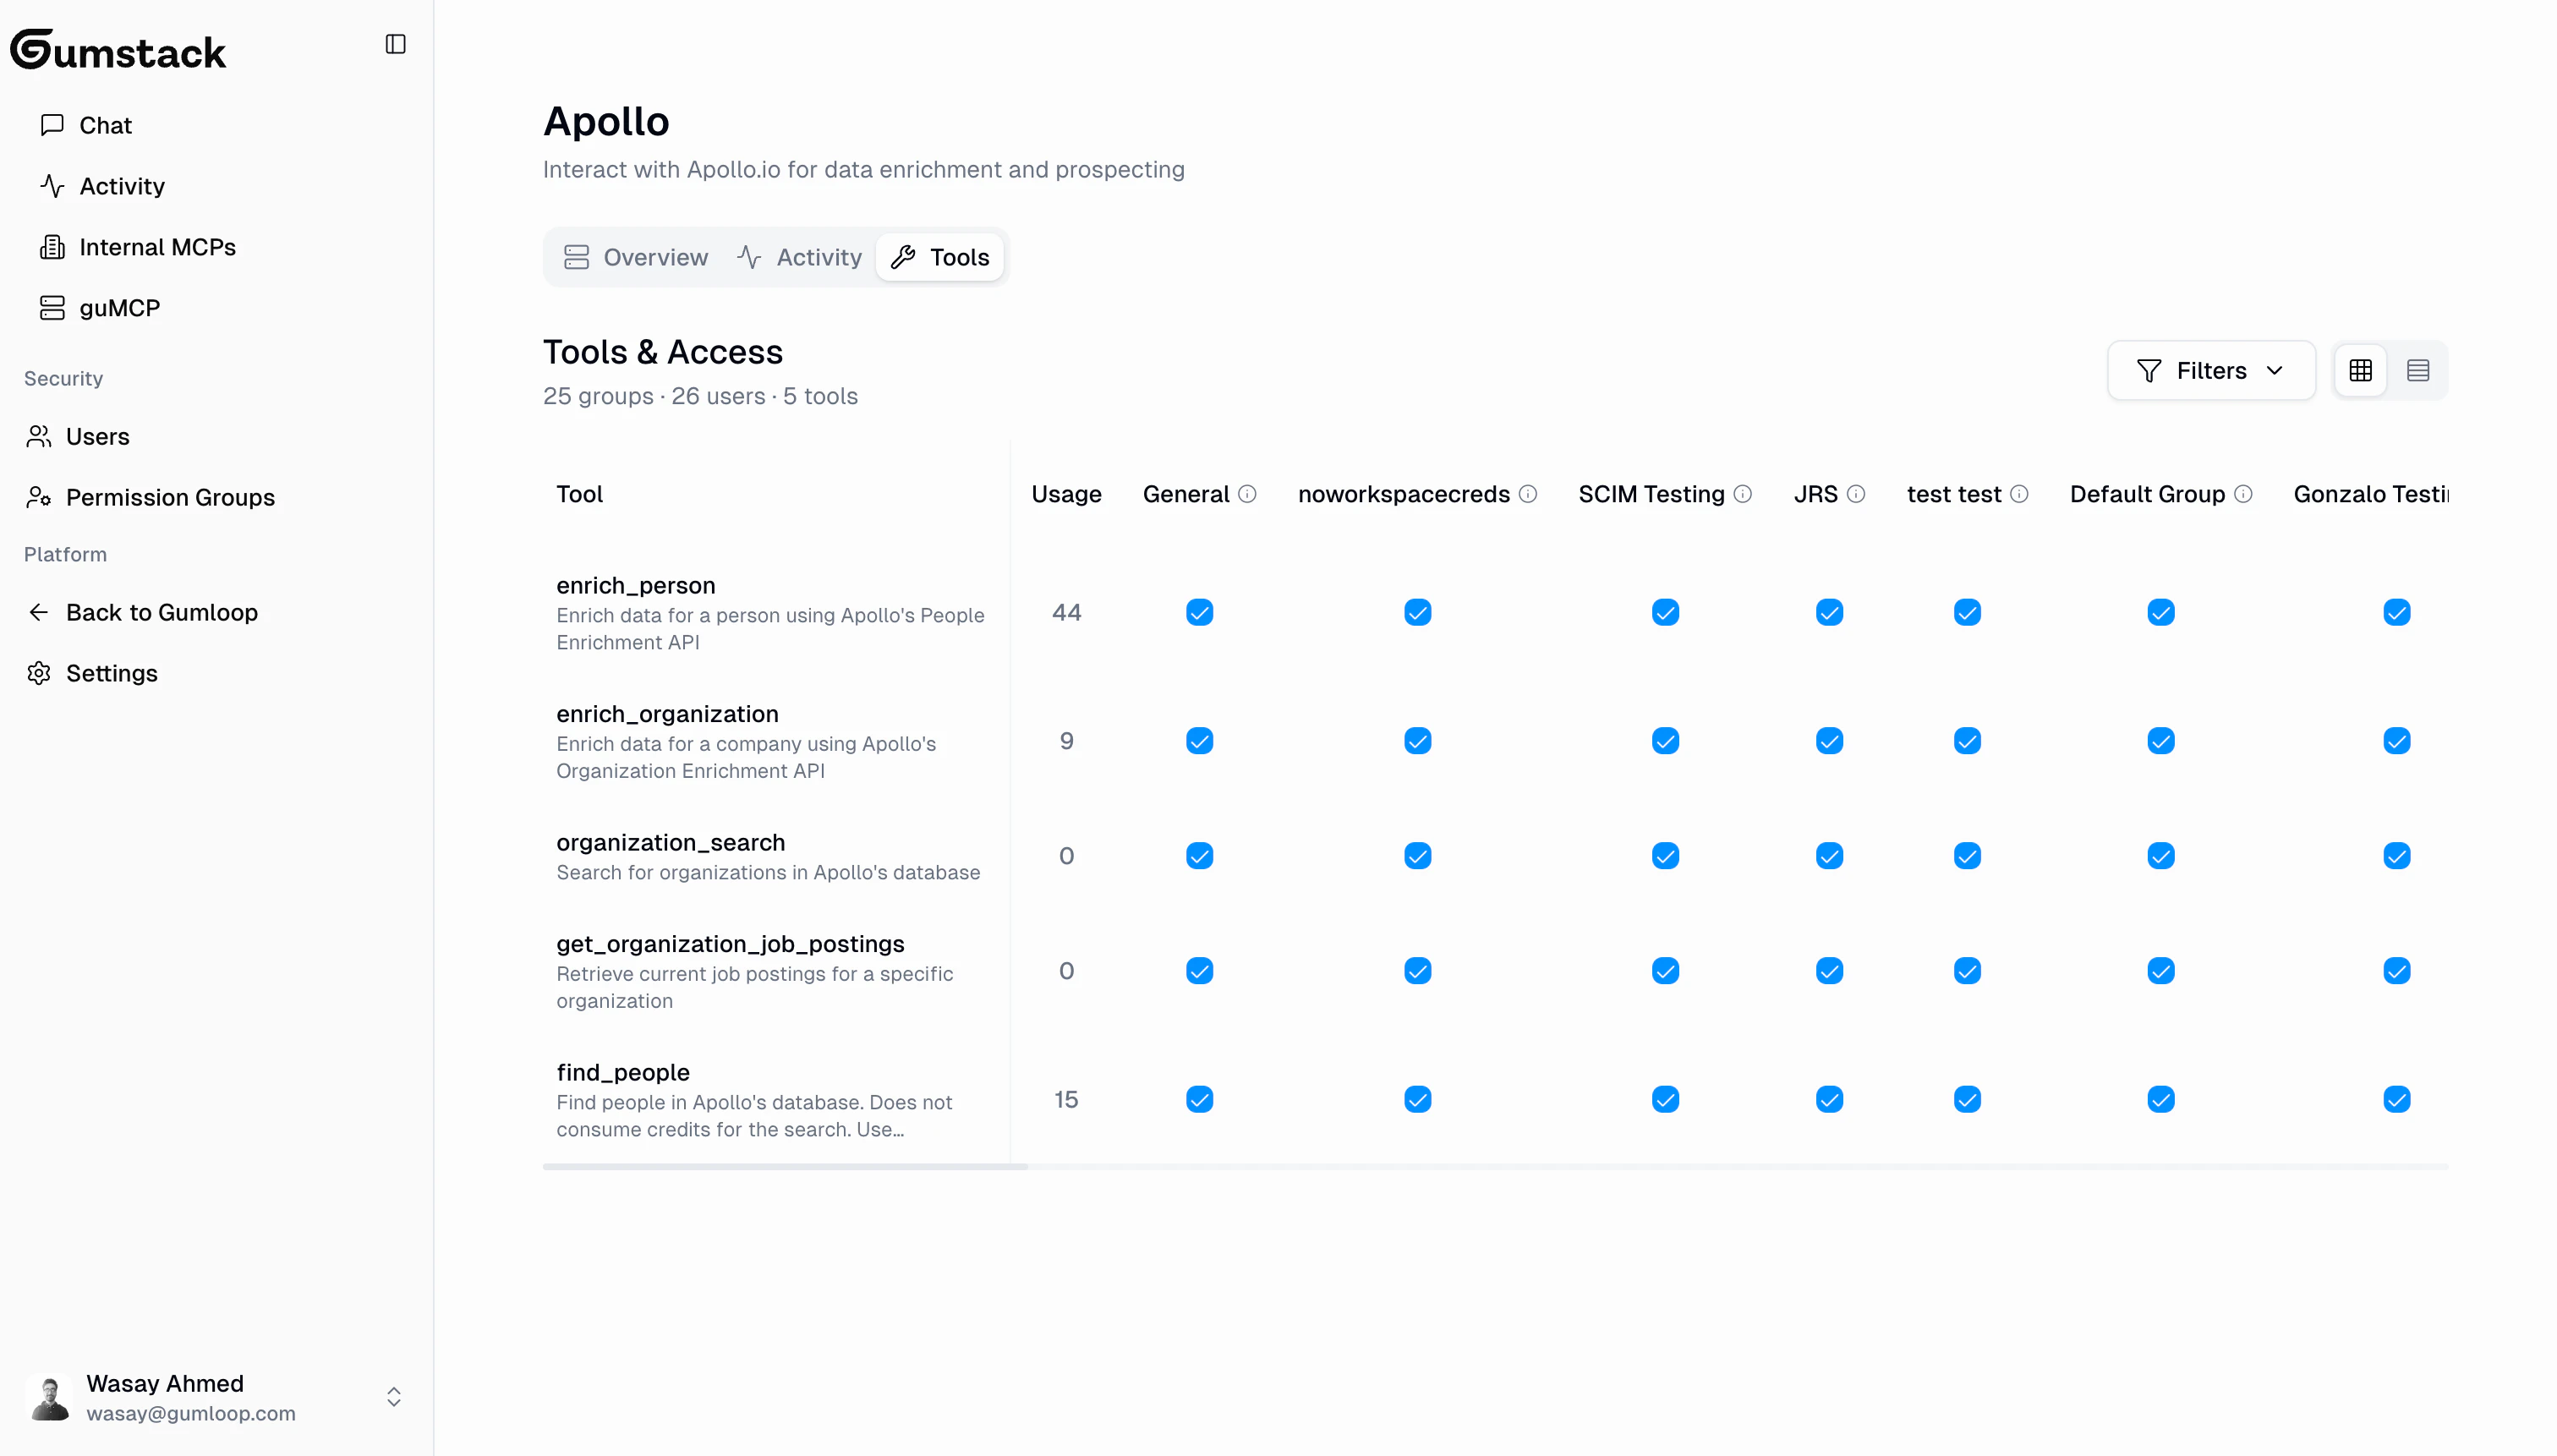
One permission group is the default group. It’s shown with a “Default” badge, cannot be deleted (you must set another group as default first), and new users may be automatically assigned to it. Change the default from any group’s detail page using “Set as Default Group”.Tool access matrix
Tool access can be configured from two places, and both stay in sync:- Permission Group > Agent Tools: Configure tool access across all servers for a group
- Server > Tools & Access tab: Configure group access per tool on a specific server
Best practices
One group per team or function
One group per team or function
Create groups that mirror your teams: Engineering, Marketing, Data, Sales. Since users can only be in one group, make sure each group covers all the access its members need.
Start restrictive, then expand
Start restrictive, then expand
When setting up a new server, start with no tool access for most groups. Grant access tool-by-tool as teams need it.
Use the default group wisely
Use the default group wisely
Set a sensible default group with baseline permissions. New users are assigned to it, so it should have the minimum access most people need.
Review access regularly
Review access regularly
Periodically check the permission matrix on each server. As teams change and tools evolve, access levels should be updated.
Monitor permission denials
Monitor permission denials
Check the Activity dashboard for “Permission Denied” entries. Frequent denials might mean a group needs access to a tool they’re blocked from.
Related docs
Users
Manage user roles and group membership
Internal MCP Servers
Configure tool access on your custom servers
guMCP Servers
Configure tool access on pre-built servers
Activity
Monitor permission denials and tool usage